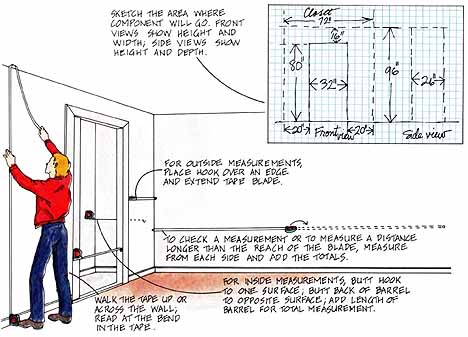
Sizing up your space is the first order of business. Using graph paper to help you draw your room in proportion, sketch the major features of the area where the component will go. Measure and record the height, width, and depth of these features (walls, door and window openings) on your freehand sketch. Work your way down to the details (trim, and so forth). The more you know about the space before you lay out your project, the better. The easiest measuring tool for most places is a 3/4-inch-wide, spring-loaded, lockable steel tape 12 or 16 feet long. If you’re measuring a spot where you can’t read the tape, lock the tape in its extended position and then take it out to read it.
Plumb, Flat, and Parallel
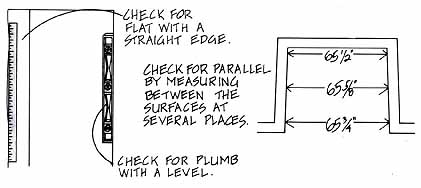
Although they may look perfectly all right to your eye, walls aren’t necessarily plumb (truly vertical), flat, or parallel to one another. Before you cut the pieces of your project, check the walls. If you need to make a correction, either shim out the wall surfaces so they’re even, or add or subtract shelf length to solve the problem.
Previous: Spans and Loads
Next: Layout and Cutting List
ALL ARTICLES in this Guide:
DIY and Custom-Made Storage Solutions: Components You Can Build for Home, Office ... as a Hobby or for Sale (Profit, earn Income)
